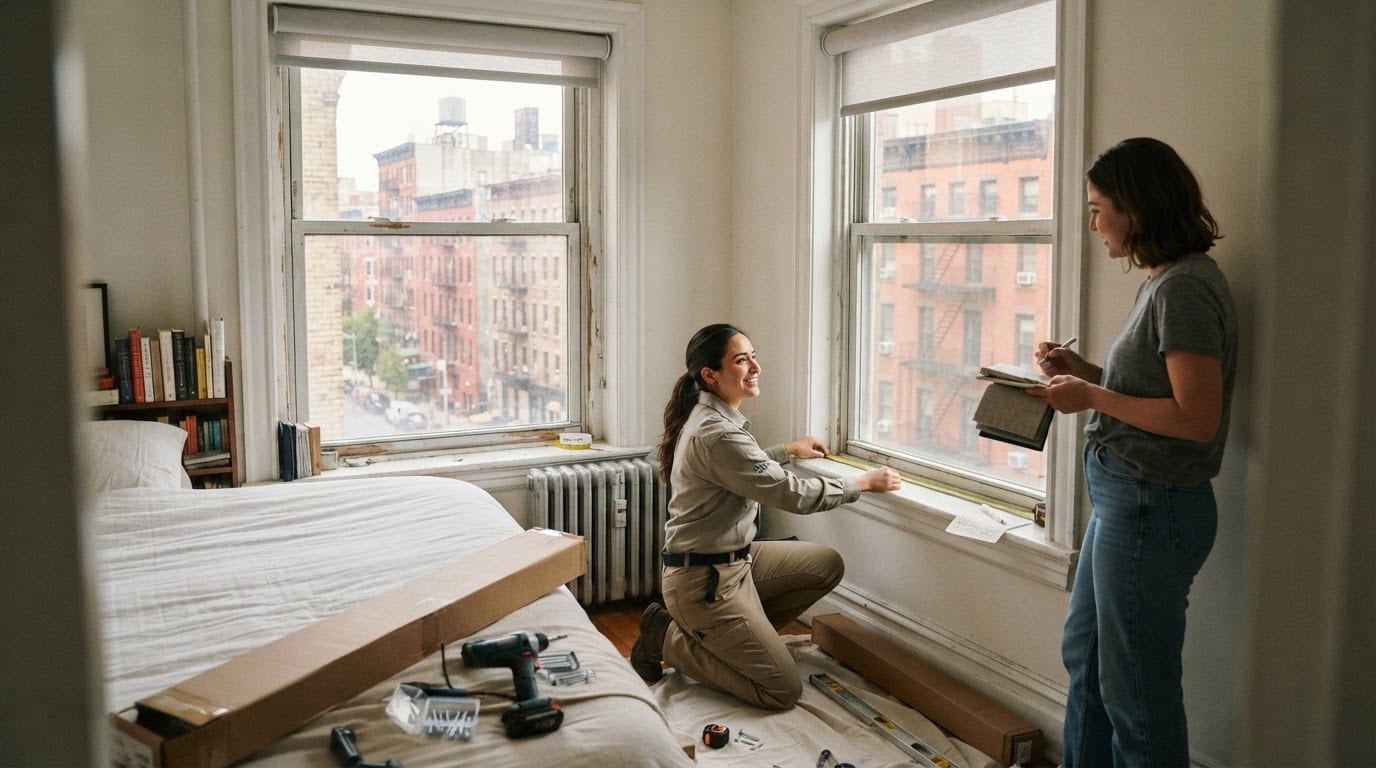
A window in a prewar Manhattan building rarely matches the dimensions printed in a product catalog. The frame may be a half inch out of square, the sill may be only a few inches deep, and a cast-iron radiator below may leave less clearance than expected. These conditions determine whether a blind hangs cleanly or rattles against the trim every time the heat comes on, so they belong at the start of any purchase decision.
Residents who begin by searching for a Blinds company New York will find a wide range of providers, from showrooms that measure and install in-house to online retailers that ship made-to-measure orders for self-installation. Knowing how the work differs in older city apartments helps you judge which model suits your building, your budget, and your tolerance for measurement risk.
Whichever route you take, the decision starts with a few practical questions about your windows, your household, and your building’s rules. A provider such as The Blinds Source can walk you through those trade-offs, but the checks below apply regardless of which company you choose.
Start With Measurements That Account for Older NYC Windows
Mount type is the first decision because it governs almost everything else. An inside mount sits within the window reveal, giving a flush, tailored look. Most cellular and roller products need at least two inches of clear depth, and the reveal must also clear the hardware and any stacked fabric. An outside mount fastens to the wall or casing above and beyond the opening. It hides out-of-square frames, blocks more light at the edges, and works where reveals are shallow or the trim is decorative and should remain visible. It also tends to suit radiator-heavy rooms, because the bracket sits above the heat source rather than inside the opening.
Stack-back depth is often overlooked. When a shade is raised, the fabric or slats gather at the top, and that stack takes up vertical space and sometimes depth. In a tall window with a low sill, a stack can block the lower sash or interfere with a radiator cover. Installers typically confirm that the stacked height and the bracket depth both fit before fabrication begins.
Prewar buildings introduce several recurring problems:
- Uneven frames: Measure width at the top, middle, and bottom, and height at the left, center, and right. For an inside mount, order to the narrowest dimension; for an outside mount, order to the widest.
- Shallow sills: Limited depth restricts bracket placement and can force a switch to outside mount.
- Deep reveals: Long reveals may require hardware extensions or can leave a shade floating, affecting how it tilts and seals.
- Trim and casing: Crown molding, plaster returns, and window stops can prevent a bracket from sitting flat.
Pre-1978 buildings add a regulatory layer. The EPA’s Renovation, Repair and Painting (RRP) rule requires certified renovators to follow lead-safe work practices when disturbing painted surfaces in older housing. Drilling into painted casings during installation can trigger those requirements, so ask whether the installer holds current RRP certification.
A professional measure is worth paying for when windows are oversized, arched, or set in bay configurations, when the frame varies by more than about a quarter inch, or when a wall-mounted radiator sits directly beneath the opening. Measurement visits commonly cost between $50 and $100 per visit, and many firms credit that fee against an order.
Match the Treatment to How the Apartment Is Used
Each room asks for something different. A street-facing bedroom needs privacy in the evening, when interior lighting makes a room visible from the sidewalk. A south-facing living room needs glare control in the afternoon without losing the daylight that makes the space usable. A bedroom needs light filtering or blackout performance for early mornings. Rather than choosing one product for the whole apartment, match each window to its primary function.
City living introduces specific constraints:
- Noise: Dense cellular shades with multiple cell layers reduce sound transmission modestly, though no blind replaces proper window glazing.
- Radiator heat: Heat rising from radiators can warm fabric and cause slats to warp over time. Keep lower edges clear of the heat path, and use cellular or insulating fabrics that moderate temperature swings.
- Limited wall space: In small rooms, narrow stack profiles, inside mounts, and sliding panels reduce visual clutter and keep furniture clearances intact.
Cordless and Safety-Conscious Options
Cordless designs have moved from premium option to baseline expectation. The Consumer Product Safety Commission’s window covering standard and the ANSI/WCMA A100.1 standard, developed with the Window Covering Manufacturers Association, have pushed manufacturers toward cord-free lift systems for many residential products. For New York households with young children, this matters. Local rules add another layer: under New York City Health Code §131.15, landlords must install window guards in apartments where a child aged 10 or younger lives, when requested. Window guards do not replace the need for cordless blinds, and cordless blinds do not replace guards.
When evaluating a cord-free system, check for:
- A spring-assisted or balanced lift with no exposed loops or continuous cords
- Wand-tilt or tilt-by-hand controls with no pull cords
- Cord-free rating documentation from the manufacturer
- Inner-cord and tassel-free designs on any remaining pull mechanisms
Motorized shades add convenience and scheduling, but they bring trade-offs. Battery-powered motors eliminate wiring but require periodic charging or replacement. Hardwired systems need a nearby outlet or an electrician, which can be difficult in older apartments with limited circuits. Smart-home compatibility varies: many systems use Zigbee, Z-Wave, or Thread, while Matter has emerged as a cross-platform standard. Confirm the hub your home already uses before ordering. Motorized options typically add several hundred dollars per window beyond the base product.
Understand What Drives Pricing and Quotes
Four variables account for most of the price difference between products: material, dimensions, mechanism, and sizing. Typical residential benchmarks look like this:
- Basic aluminum blinds: roughly $30 to $80 per window
- Faux wood blinds: roughly $100 to $250 per window
- Cellular or honeycomb shades: roughly $150 to $400 per window
- Motorized systems: often several hundred dollars above the manual equivalent
Width and height affect cost, but not always linearly, because larger units require heavier hardware and more material. Custom sizing for out-of-square or nonstandard openings typically carries a premium, and specialty shapes such as arches or angled windows are priced individually.
Quotes for the same window can differ substantially even when the product appears identical. Common reasons include:
- Measurement fees, which some firms charge and others waive
- Installation labor, which may be included or billed separately
- Removal and disposal of old treatments
- Delivery, stair or elevator surcharges, and building access fees
- Differences in warranty length and fabric line
- Whether hardware upgrades, such as brackets for deep reveals, are included
Ask every provider for a line-item quote showing the product, fabric or slat option, mechanism, mount, measurement fee, installation, removal, delivery, and warranty terms. Requesting the same specification from each company is the only reliable way to compare total cost.
Plan Installation Around Building and Scheduling Realities
In co-op and condominium buildings, check the rules before placing an order. Proprietary leases, house rules, and alteration agreements often govern changes to windows. Exterior-visible modifications, such as outside-mount brackets or non-approved backing colors, may require board approval. Many buildings also specify approved liability insurance for contractors, restricted work hours, and protective requirements for common corridors. Ask the building management office for a written copy of these rules before scheduling.
Access shapes the timeline. Many prewar buildings lack a dedicated freight elevator, and moves or large deliveries may require advance reservations. Doormen or superintendents may need to coordinate entry, and some buildings limit installation to specific days. Appointment windows of four hours are common, and delays at the start of the day can push work into the afternoon. Confirm elevator reservations and access requirements when you book the installation, not on the morning of the appointment.
A clean installation is recognizable. Brackets should be level and securely anchored into the wall structure rather than just plaster, with the correct fasteners for the substrate. The head rail should sit flat, the shade should operate smoothly through its full range, and cords or cordless lift mechanisms should be secured out of reach. Dust should be removed, and any patch work around holes should be completed.
On delivery day, inspect before the installer leaves:
- Confirm that the color, fabric, and dimensions match the order and that labels are attached to each unit
- View the fabric in the room’s actual light, since color can shift significantly from catalog images
- Test the lift, tilt, and stop positions on every unit
- Check that the shade clears radiator covers, sills, and sash locks
- Photograph the installation and note any scratches or damage before the crew departs
Evaluate Local Providers Before You Commit
Before signing, ask each provider these questions:
- Do you measure on site, or do you rely on customer measurements?
- Do your own installers perform the work, or are installations subcontracted?
- What insurance and business licenses do you carry for residential work in New York City, and can you provide certificates?
- Are your renovators EPA RRP-certified for pre-1978 buildings?
- What is the warranty on the product, the mechanism, and the labor?
- What is your remake policy if a measurement error is discovered after fabrication?
- Who handles disposal of old treatments, and is it included in the quote?
- How are scheduling changes and access delays handled?
Online reviews are most useful when read for patterns rather than star averages. Look for recurring complaints about timing, such as missed appointments or repeated rescheduling, which suggest operational problems. Pay attention to measurement accuracy, particularly reviews describing remakes or fitting problems in older buildings. Post-installation support is equally revealing: reviews that describe prompt warranty service indicate a provider that will stand behind its work after the crew leaves.
Finally, see the material before committing. A showroom visit or a set of physical samples lets you compare color, opacity, and texture in your own light. Hold samples against the window at several times of day, since morning, afternoon, and evening light can change how a fabric reads. Opacity matters too: a sample that looks sufficient in daylight may fail to block a streetlight at night.
